RSS

Monthly Archives: May 2009

Reset Crawled Content in MOSS 2007

In MOSS 2007 each Shared Services Provider has a single content index. Meaning that all content stored across the various content sources is referenced from a single index. This improves administration functions when you work with multiple content sources. When you make major changes to content sources and search settings or if you notice a large number of errors in search event logs, you may be required to reset the content index for your SharePoint environment. After this has been completed you need to manually initiate a Full Crawl of various content sources to repopulate the content index. If you do not rebuild the content index, search will be unable to work because the index will be empty.

How to reset all crawled content:

  • Go to your Shared Services Administration site of your SharePoint environment and select Search Settings.
  • Then select Reset All Crawled Content.
  • Leave the checkbox to deactivate all search alerts during the reset (see below image). This will avoid any unnecessary alerts being sent to users of the system during this update.

Reset Crawled Content


  • Once completed be sure to perform a Full Crawl to repopulate the content.
 
2 Comments

Posted by on May 27, 2009 in SharePoint Tips


Resource Cannot Be Found or File Not Found Error in MOSS

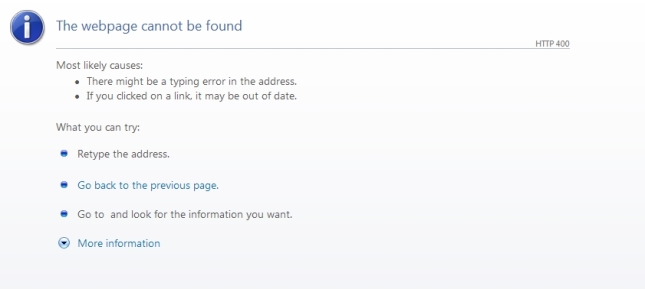
When attempting to navigate to our SharePoint portal we received the infamous “File Not Found” error. (See image below)


File not found

We tested our database connection by creating an ODBC connection and it was successful. Not only were the portals down but Central Administration was as well. So we made the following changes:

Follow these steps:

1.       Navigate to C:\inetpub\wwroot\wss\Virtual Directories\
<your web application’s virtual directory>

a.       You can also open IIS

b.      Expand Sites

c.       Right click on your sharepoint site

d.      Choose explore

e.      Then proceed to step 2

2.       Copy and paste the web.config file (making a backup)

3.       Open web.config using notepad.

4.       Search for “CallStack” , set this equal to true.

5.       Search for “Custom”, set the customerrors = “Off”.

6.       Save the web.config file and refresh your page in the browser.

After we made these changes we started receiving the message below:

Server Error

I then right-clicked on the page and selected “View Source” and saw the information highlighted below:

</font>

    </body>
</html>
<!–
[FileNotFoundException]: The file /_catalogs/masterpage/_controltemplates/Welcome.ascx does not exist.
   at Microsoft.SharePoint.ApplicationRuntime.SPRequestModuleData.GetWebPartPageData(HttpContext context, String path, Boolean throwIfFileNotFound)
   at Microsoft.SharePoint.ApplicationRuntime.SPVirtualFile.CalculateFileDependencies(HttpContext context, SPRequestModuleData basicRequestData, ICollection& directDependencies, ICollection& childDependencies)
   at Microsoft.SharePoint.ApplicationRuntime.SPDatabaseFile.EnsureDependencies(HttpContext context, SPRequestModuleData requestData)
   at Microsoft.SharePoint.ApplicationRuntime.SPDatabaseFile.GetDirectDependencies(HttpContext context, SPRequestModuleData requestData)
After looking in that directory the file was not missing. I decided to look at it using SharePoint Designer. What I saw using Designer was the following image:

Designer Error

I finally found this information:

Most likely the tilde sign “~” has dissapeared in your references on the masterpage after editing it in the sharepoint designer.

In the beginning of the masterpage you have register statements that should look like this

Code Snippet

<%@ Register TagPrefix=”wssuc” TagName=”Welcome” src=”~/_controltemplates/Welcome.ascx” %>
<%@ Register TagPrefix=”wssuc” TagName=”DesignModeConsole” src=”~/_controltemplates/DesignModeConsole.ascx” %>

After reviewing the file in Notepad I realized the ~ symbols were in fact missing but after inputting them I received another error but at least it told me it was a problem with the default.master page. I copied over the default.master from the backup the night before and it worked like a charm. Not sure what changed the page but just another reminder to always have a backup copy!! I realize this is not an exact fix but when production is down and you know what the problem is, why wait to fix it?

Ok so after diving a little deeper into this after the fact it seems there is a glitch in SharePoint Designer where when you open certain pages, including default.master, it adds/removes code. We opened the same file this morning and saved it after making minor changes and it was corrupted again but when you open the same file in Notepad and make the needed changes and save it, it works fine. I am sending this to Microsoft Support to get their opinion on it. Just a note of caution to those of you who use SP Designer to make a backup copy before opening it period.

Microsoft’s Response:

SharePoint Designer actually breaks the master page when it opens because you are essentially un-ghosting the site.  The recommended way to customize this page is to make a copy of it, and edit the copy.  Then you would designate the custom master page to be the default master page for your site.  The reason it breaks is because SPD changes the path of two URLs within the master page.  To be specific, line 5 and 6 of the file look like this before you open it:

<%@ Register TagPrefix=”wssuc” TagName=”Welcome” src=”~/_controltemplates/Welcome.ascx” %> <%@ Register TagPrefix=”wssuc” TagName=”DesignModeConsole” src=”~/_controltemplates/DesignModeConsole.ascx” %>

After opening it, you see this:

<%@ Register TagPrefix=”wssuc” TagName=”Welcome” src=”_controltemplates/Welcome.ascx” %> <%@ Register TagPrefix=”wssuc” TagName=”DesignModeConsole” src=”_controltemplates/DesignModeConsole.ascx” %>

Notice the ~/ are missing from in front of src=”_controltemplates.

This is why when you try to look at the page in design view, you see all those errors, if you add the /~ back, the design view will no longer show all those errors and the page will render correctly. 

Also, another reason it is not recommended to edit the default master page is because you run the risk of a HotFix, Cumulative Update, or Service Pack overwriting it and potentially causing loss of functionality while you are fixing it or losing all your hard work if it was not backed up since you made changes to it. Please let me know if you have any questions.

  • This to me is a cop out answer for a Microsoft product they released specifically to edit SharePoint.
 
23 Comments

Posted by on May 21, 2009 in SharePoint Common Issues


How to Start/Schedule a Crawl in MOSS 2007

If you don’t see your item in search result in MOSS 2007, most likely means your item(s) have not been crawled. How can we do this manually or set a schedule for this?

  1. Open MOSS 2007 Central Administration > Application Management > Create or configure this farm’s shared services in “Office SharePoint Server Shared Services” group.
  2. Open your web applications Shared Services page
  3. Click on “search settings” in search group.
  4. Click on “Content sources and crawl schedules” and open context menu of your content source.
  5. In context menu you will get these options (see image below):
  • Edit
  • View Crawl Log
  • Start Full Crawl
  • Start Incremental Crawl
  • Resume Crawl
  • Pause Crawl
  • Stop Crawl
  • Delete

Content Sources

You can start crawling manually here but what is recommended is to set a schedule. To do this click on “Edit” and you will get two “Crawl Schedules” options. One is the Full Crawl option and the other is the Incremental Crawl option. Click on the link you want to create a schedule and give you schedule types, time and repeat times (if this applies). It is best practice to set Incrementals throughout the week and a Full on the weekend or evening considering the time it takes to complete. You can always run a crawl manually to have information appear immediately when necessary.

Click OK

 
5 Comments

Posted by on May 20, 2009 in SharePoint Common Issues


Crawl Log Errors/Warnings

We were receiving this error message in our crawl log for our top level site:

https://top level url

The item could not be accessed on the remote server because its address has an invalid syntax.

I had never seen this before in our logs so I actually tracked down the file that was specified in the top level url and navigated to it. When I found the specified document and clicked on it, it came up with the message below:

Crawl Log Error

I wanted a backup copy so I clicked on the drop down arrow to the right of the document and highlighted Send To and downloaded a copy (see image below) just in case. Then I deleted the document(s).

Download a Copy

Once I removed the document(s), I ran a full crawl and the error did not reappear. What I found out was that we had actually exceeded the 256 character path limitation. This file was about 8 folders deep in a subsite so it was 1 character too long. Here is my suggestion on working around this and also a list of MOSS limitations. I hope this helps!

 This is a limitation of .NET (C#, VB, etc), the language that SharePoint was built on.  

When programming in .Net there are ways around this using Win API calls, but I am inclined to believe that MS did not use any WIN API calls, but rather used the native .Net file handlers

I’ve found a way around this by creating another network place on the server that points to the folder that is buried a lot further down.

For example:
\\server\path1\longpath2\longpath3\longpath4\reallylongname.txt   (assume this is 300 characters)

\\server\path1\networkplace\reallylongname.txt  

Short of that, there is not much you can do.

Another suggestion as far as some of the limitations…inform the client not to use spaces in file or folder names. If they need a space, they should use a dash or an underscore since html for a space is %20. This takes up three characters in the URL versus one for a – or an _. Those extra spaces add up fast.

SharePoint 2007 Maximum Limitations

Following is a list of names and other parameters with the maximum allowable size on each.

Entity                        Max Permissible Size
Site Name                    128 characters
Site URL                 255 characters
Display name                 128 characters
Connection string                 384 characters
Email address                    128 characters
Version numbers                064 characters
Virtual Server Friendly Name            064 characters
SQL Database Name                123 characters
SQL Database Column                128 characters
SQL Database Table Name            128 characters
SQL Role Name                    128 characters
Server Name                    128 characters
Windows User Name                300 characters
Windows Password                300 characters
Dependencies per object            032 objects
Zone enumeration value            004 zones
Default SQL command timeout             300 seconds
Number of simultaneous
workflows that can be run*             015

If during your course of using the product, you inadvertently cross these limits, then you would end up with errors. These are hard limits.

 
Leave a comment

Posted by on May 20, 2009 in SharePoint Common Issues


Submit your SharePoint Issues

Please submit any questions you have here and I will do my best to assist or at least point you in the right direction. It is difficult to get good SharePoint help that doesn’t cost anything so let me know what I can do to help.

 
3 Comments

Posted by on May 19, 2009 in Your SharePoint Issues


Extract documents from a SharePoint database

We had a situation come up where we had taken down a SharePoint server and of course all of the users said they had everything they needed from it until 3 weeks later when several documents were found “conveniently missing”. All we had left were the databases from the installation and I found a really good script to extract documents from your database.

General Warning

This script goes directly against a MOSS 2007 content database which is generally discouraged. Any code using the database directly will not be supported by MS Product Support Services. Instead, the SharePoint and WSS APIs are the way to go. If the database is modified directly rather than through the published SharePoint and WSS APIs Product Support Services cannot properly troubleshoot any unexpected issues. This script reads from the database so we’re safe from errant modifications. However, the data structure the script queries could change in a future service pack.

Here is the script we used and you can copy and paste this into Notepad and save it as ex “extractdoc.vbs”.

Dim contentDatabase
Dim leaf
Dim outputPath
server = “server name
contentDatabase = “database name
leaf = “filename
outputPath = “C:\Temp\filename

ExtractDoc server, contentDatabase, leaf, outputPath

Sub ExtractDoc(server, contentDatabase, leaf, outputPath)

  Dim conStr, selectStr

  conStr = “Provider=SQLOLEDB;data Source=” + server + “;Initial Catalog=” + contentDatabase + “;Trusted_Connection=yes”

  selectStr = “SELECT dbo.AllDocStreams.Content FROM dbo.AllDocs ”
  selectStr = selectStr + “INNER JOIN dbo.AllDocStreams ”
  selectStr = selectStr + ”  ON dbo.AllDocs.ID= dbo.AllDocStreams.ID ”
  selectStr = selectStr + ” AND dbo.AllDocs.Level = dbo.AllDocStreams.Level ”
  selectStr = selectStr + ” where LeafName='” + leaf +”‘ AND IsCurrentVersion=1″

  Set cn = CreateObject(“ADODB.Connection”)
  Set rs = CreateObject(“ADODB.Recordset”)
  cn.Open conStr
  Set rs = cn.Execute(selectStr)
  Set mstream = CreateObject(“ADODB.Stream”)
  mstream.Type = 1
  mstream.Open
  mstream.Write rs.Fields(“Content”).Value
  mstream.SaveToFile outputPath, 2
  rs.Close
  cn.Close
End Sub

This took some research to find but it worked like a charm. Simply replace the server name, database name and filename fields with the appropriate values and you’re good to go. The filenames unfortunately have to be exact or it will not find it. Also, be sure to include the extension with the filename.

Hope this helps!

 
2 Comments

Posted by on May 12, 2009 in SharePoint Tips


SharePoint won’t uninstall

So you need to uninstall SharePoint and you go to the Control Panel and Add/Remove Programs and select “Remove”. It goes through telling you that certain services will have to be restarted etc etc and it seems to start the uninstall process with the progress bar but then it the screen just blinks and your back at the Add/Remove Programs box with SharePoint still there. This is usually a pretty simple issue but there have been two instances when this has happened to me.

One instance is where you still have databases that are connected to the SharePoint instance you’re attempting to uninstall. You need to remove the databases or at least detach or take offline the ones that are there. If not, SharePoint still sees it as an existing connection and could stop the uninstall from happening. However, this is not always the case.

Another instance is simply if your Application Log in the Event Viewer is full. It seems silly but if you’ve ever had your server hang for no apparent reason then it’s an easy fix but not something  you think of right off the bat. As soon as I set the Application Log to overwrite as needed it uninstalled successfully.

 
Leave a comment

Posted by on May 12, 2009 in SharePoint Common Issues


Object “database name” failed in event OnBackup

This happened when I was attempting to run a full farm backup using the Central Admin GUI backup utility. This was the first attempt at backing up our environment.

Here is a screenshot of what appears in Central Admin

Backup Failure


Error Details

Object “database name” failed in event OnBackup.

For more information, see the error log located in the backup directory.

SqlException: Cannot open backup device ‘\\

\”backup directory”\spbr001F000000B.bak’. Device

error or device off-line. See the SQL Server error log

for more details. BACKUP DATABASE is terminating abnormally.

Resolution

This turned out to be a DNS issue between our database server and our SharePoint server. Our SharePoint server was not registering properly in DNS.  It was pointing to an internal DNS server so we changed our SP server to point to the correct DNS server. A simple fix for a not-so-simple error message.

 
Leave a comment

Posted by on May 8, 2009 in SharePoint Common Issues


Getting prompted for a username/password when connecting to your site

Getting prompted for a username and password when attempting to connect to your SharePoint portal

Most likely this is happening because your portal or Central Administration has not been added to your trusted sites list. Here is how to resolve this issue if using Internet Explorer 7.0 since this is the most common web browser:

  • In Internet Explorer, on the Tools menu, click Internet Options
  • On the Security tab, in the Select a zone to view or change security settings box, click Trusted Sites, and then click Sites
  • In the Add this Web site to the zone box, type the URL for the SharePoint Central Administration site or SharePoint portal, and then click Add
  • Select the Require server verification (https:) for all sites in this zone check box (if using SSL certificates)
  • Click Close to close the Trusted Sites dialog box
  • Click OK to close the Internet Options dialog box

Configure user authentication settings for trusted sites

  • In Internet Explorer, on the Tools menu, click Internet Options
  • On the Security tab, in the Select a zone to view or change security settings box, click Trusted sites, and then click Custom Level
  • In the Settings list box, under User Authentication, click Automatic logon with current username and password
  • Click OK twice

Note: If you do not want to add the SharePoint Central Administration site or portal to the list of trusted sites, but you do not want to be prompted for your user name and password every time you access the  site, you can instead add the  site URL to the Local intranet zone. If you do this, you must enable the Automatic logon only in Intranet zone user authentication setting instead of the Automatic logon with current username and password user authentication setting.

 
Leave a comment

Posted by on May 8, 2009 in SharePoint Common Issues


Installing MOSS 2007 (x86)

This post relates to installing Microsoft Office SharePoint Server (MOSS) 2007 in a secured environment with the following network setup:

  • Two server setup using Server 2003 – One web front end to run all MOSS services and one SQL server
  • SQL Server 2005 – Maintains all databases for MOSS installation

If you need to know the software/hardware requirements check that out here

In order to begin your MOSS installation you should have all critical updates applied and configure the server to be a Web server by enabling Internet Information Services (IIS) 6.0, including:

  • Common Files
  • WWW
  • SMTP ( Only if you’re going to be using e-mail services within SharePoint for notifications or so that SharePoint can accept and archive incoming email)

By default, on new installations, the server is set to use IIS 6.0 worker process isolation mode. If you upgraded from IIS 5.0 on Server 2000 Run WWW in IIS 5.0 isolation mode is enabled and must be changed to IIS 6.0 worker process isolation mode.

Also before installing MOSS you must have .NET Framework 3.0 installed and be sure that ASP.NET 2.0 is enabled. I recommend taking that one step further and updating to .NET Framework 3.5 SP1 since it’s a little trickier if you start out with 3.0 and want to upgrade later.

To enable ASP.NET v2.0.50727, open the Web service extension in the IIS snap-in on the Microsoft Management Console (MMC). If ASP.NET 2.0 is installed on the computer before IIS is enabled, you must enable ASP.NET 2.0 by running the command aspnet_regiis -i.

Next you need to have your SharePoint accounts set up. This varies depending on what you want out of your accounts. If you’re looking for security but higher management I recommend multiple accounts to run the different SharePoint services but a lot of users tend to lean towards having one administrative account to run everything. It is easier to manage that way but a LOT less secure. You can use as many or as few accounts as you’d like but the more you use the more confusing it gets when setting up permissions individually. Using Microsoft’s recommended way, you could end up with up to 13 accounts but after speaking with them personally it is just as safe to consolidate this to 4 or 5 accounts.

My accounts setup was as follows:

  • SQL service account – This account is used as the service account for the following SQL Server services (MSSQLSERVER,SQLSERVERAGENT)
  • Admin service account – This account is used to run the MOSS 2007 install, the SharePoint Products and Technologies Configuration Wizard, the psconfig command-line tool and the stsadm command-line tool
  • Search service account – This account is used as the service account for the Office SharePoint Server Search service
  • Application Pool service account – The user account that the worker process that service the application pool use as their process identity
  • Shared Services Provider service account – This account is used to manage all Shared Service Provider services

Once you have created your accounts whether using my setup or your own, ensure that the admin account used to run your installation is a member of the local administrators group on all SharePoint servers in your farm. This account must also have the securityadmin and dbcreator SQL Server security roles applied on the database server. You also need to ensure your SQL service account has the securityadmin, dbcreator and db_ownerSQL Server security roles applied on the database server. For more information on permissions that should be applied manually click here. For setup purposes these are all you need.

You are now ready to begin your MOSS 2007 installation:

  • Run Officeserver.exe
  • Enter your product key and click Continue

SharePoint key

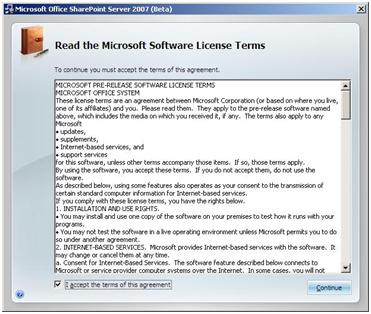
  • On the Read the Microsoft Software License Terms page, review the terms (yeah right), select the I accept the terms of this agreement check box, and then click Continue

License Terms

  • On the Choose the installation you want page, click Advanced (If you want to run a basic setup with the default settings choose Basic)

Installation Type

  • On the Server Type tab, for this installation we’ll click Complete (If you would like to change the installation directory click the File Location tab and change it there)

Server Type and File Location

  • When Setup finishes, a dialog box appears telling you that you must complete the configuration of your server. Make sure that the Run the SharePoint Products and Technologies Configuration Wizard now check box is selected.
  • Click Close to start the configuration wizard.

The SharePoint Products and Technologies Configuration Wizard is used to configure MOSS 2007. It also allows you to install and configure the configuration database (unless pre-created), install the MOSS 2007 services and install SharePoint Central Administration. Use the following instructions to run the SharePoint Products and Technologies Configuration Wizard:

  • On the Welcome to SharePoint Products and Technologies page, click Next

Configuration Wizard

  • Click Yes in the warning dialog box that appears notifying you that some services might need to be restarted during configuration.
  • On the Connect to a server farm page, do one of the following:

Since this is the first front-end server that you are configuring in your server farm, click No, I want to create a new server farm, and then click Next. If you are joining a server to your farm click Yes, I want to connect to an existing server farm

Connect to a server farm

  • On the Specify Configuration Database Settings dialog box, in Database server, type the name of the computer that is running SQL Server (ex \\servername)
  • If you have not pre-created your databases and this is the first server that you are configuring in your server farm, type a name for your configuration database in Database name, or use the default database name. (If you are going to have multiple SharePoint servers using your SQL Server it is best practice to name it something unique)

Configuration Database Settings

  • In Username, type the username of the account used to connect the the computer running SQL Server. In this case we’re using the SQL Server service account. (be sure to type the username in the format DOMAIN\username)
  • In Password, type the user’s password and click Next
  • On the Configure SharePoint Central Administration Web Application page, select the Specify port numbercheck box and type a port number if you want the SharePoint Central Administration Web application to use a specific port or leave the Specify port number check box unchecked if you want to use a random port

Configure Central Admin

  • On the Configure Security Settings portion of this page choose whether you’re going to use the default NTLM authentication or Kerberos. Kerberosrequires additional steps and are not covered in this particular post but will be in a future post focused specifically on Kerberos. Once selected, click Next
  • On the Completing the SharePoint Products and Technologies Wizard page, click Next
  • On the Configuration Successful page, click Finish

This is assuming the configuration completes successfully. There are many common issues that occur during initial setup and configuration that are not covered in this post. I will post information on SharePoint Common Issues soon.

At this point your new Central Administration page should open automatically. If you are prompted for a username and password you may need to add the SharePoint Central Administration site to the list of trusted sites and configure user authentication settings in your browser.

**Important notes**

Before moving forward with configuring SharePoint, creating sites etc. Be sure to install all needed Service Packs and updates beforehand. Installing updates to SharePoint can be tricky but here are a few helpful tips:

  • Always apply updates to Windows SharePoint Services (WSS) and then apply updates to MOSS
  • Apply service packs before any infrastructure or security updates
  • If you have multiple updates to apply you can install all of them with or without running the configuration wizard until you’ve finished installing them and then complete it by running the configuration wizard
  • Always make a good backup of all databases and of your SharePoint servers if possible before applying ANY updates!!!!
 
Leave a comment

Posted by on May 8, 2009 in SharePoint Installation